Here's how I did mine:
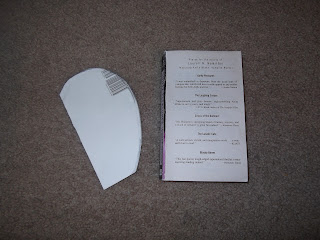
First you find a book that you don't mine cutting up. Then remove the front cover and draw & cut out a half of apple shape on to the removed cover.
Use this cut piece as a template to cut the half apple from the book. You need to make sure you place the edge on the spine of the book and not cut this edge.
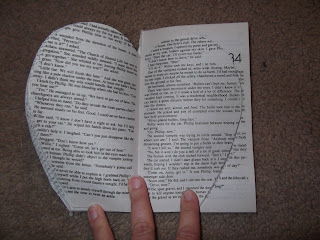
Continue to flip the cut pages over and cut until you make it all the way through the book.
When done use a scissor to even out the pages and make sure to fold the front page to the back page together make sure that the pieces match, if they don't just trim until they do.
When done it will look like this:
Now is a good time to put the front page and back page together, fan out the pages and see if you need want less pages- really just your preference to how full you want your apple to be.
Next I took red acrylic paint and added water to dilute it. The water will make the color lighter and also let the color bleed into the apple. Now hold the book with all the pages together paint the edges.
After painting you need to dry the pages with a blow dryer so they don't stick together. If you let the pages fan out while drying them it makes the pages spread out nice and evenly- I think it is the heat loosening the glue on the spine of the book.
Next glue a piece of stick into the spine of the book. I used fabric glue because I have found it holds really well and it doesn't make the pages wrinkle. Then glue the front and back pages together and hold them closed with paper clips or binder clips. Only glue the front and back pages together but paper clip more than those 2 pages so that the book drys with the pages spread out.
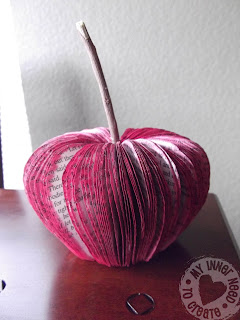
I let mine dry overnight and voila! A finished book apple! I sprayed mine with clear spray varnish to make the pages a little stiffer.
After making this apple I decided that it would be cuter and more practical to make the apple smaller and into an ornament. So I went back and did all these steps but smaller (I actually fit two onto one book) and then tied a piece of fishing line onto the "stem" so that this could be a Christmas ornament.
I love the finished product & the teachers loved it too! Might be making these for future teachers for years to come!


Thanks, but i couldnt get mine to spread out:(
ReplyDelete