Showing posts with label Bags/Totes. Show all posts

Wednesday, July 24, 2013

Appliqued Messenger Bags


I think that I will start off this post with a glowing recommendation for Oliver + S patterns. I don't own as many as I would like because they are so expensive but for my birthday a couple years ago I received Little Things to Sew and have found many favorites in the book.
 
The pattern that I have made the most is the Messenger Bag, they come together so quickly and professionally. I have made both the large and small bags:


My newest bags are small ones for my daughters to carry some toys with them for when we are running around town this summer.


I appliqued one of the gray bags with a monarch butterfly.
 
 
I used the same butterfly template I sketched out for the Rainbow Butterfly Skirt I made last year. But instead of putting the rainbow colors behind the black butterfly cut-out, I put just plain orange fabric. The white dots are just white fabric paint.
 
 
I lined the bag with the same orange- I love the sharp contrast of the monochrome bag with the bright orange.
 
 
The second bag I made I chose to honor my Texan roots and applique the state flower, a Bluebonnet, onto the bag.
 
 
I used the same technique of placing the colored fabric under the black cut out of the flower before zig-zaging around all the raw edges.
 
 
I lined this bag with the middle shade of blue (used in the flower applique).


I am in love with these bags and am brainstorming right now what to applique on one for me that won't be too kid-ish.
 
Hope you all are having a great summer!
~Jessica
 

Thursday, July 5, 2012

Owl Messenger Bag

Owl Messenger Bag

Ok, so the next couple posts are going to be baby related, well, more owl related.
My little sister is having her first baby in a couple weeks and last week I helped host a shower for her, so I am going to post the invitation, cake , favors, etc.
But first, my favorite, the owl messenger bag I made for her.
Owl Messenger Bag

Owls/woodland creatures are the theme for her nursery and for our shower, so what better to applique onto a messenger diaper bag than an owl.


I started with the messenger bag pattern from Little Things to Sew from Oliver + S. If you haven't noticed, I LOVE this pattern. I have already made it a couple times:


Once for my son and once for me (attaching snaps on the back so I can attach it to my bike).

Owl Messenger Bag

For this bag I spent the big bucks on a really cool patterned duck fabric they are now carrying at Hobby Lobby. I paired it with a orange gingham and made my own orange bias tape. For the strap I used a piece of off-white corduroy.

Owl Messenger Bag

For this bag a switched up the pattern a little bit by alternating between having the lining fabric be on the inside and sometimes on the outside. I

Owl Messenger Bag

For this bag I also used the double loop fastener as the strap lengthener (I still can't find the 2 inch hardware that the pattern calls for).

Owl Messenger Bag

I think the bag turned out really cute, and so does my sister, she told me this week that it is the bag she is taking it to the hospital!

Owl Messenger Bag
Owl Messenger Bag

Friday, March 23, 2012

Personalized Kids Backpack

Kids Personalized Backpacks

 I got this Oliver & S Little Things to Sew book for my birthday. I love so many of the patterns in it I already made the Messenger Bag (I made it into a bike bag, check out my post here.) I also used the Bucket Hat pattern in my entry to Project Run and Play (check out the post here.)
Two of the girls on my soccer team (they are twins =) are having a birthday party and we are going. I wanted to make them something special and I thought of the backpack pattern in the book.
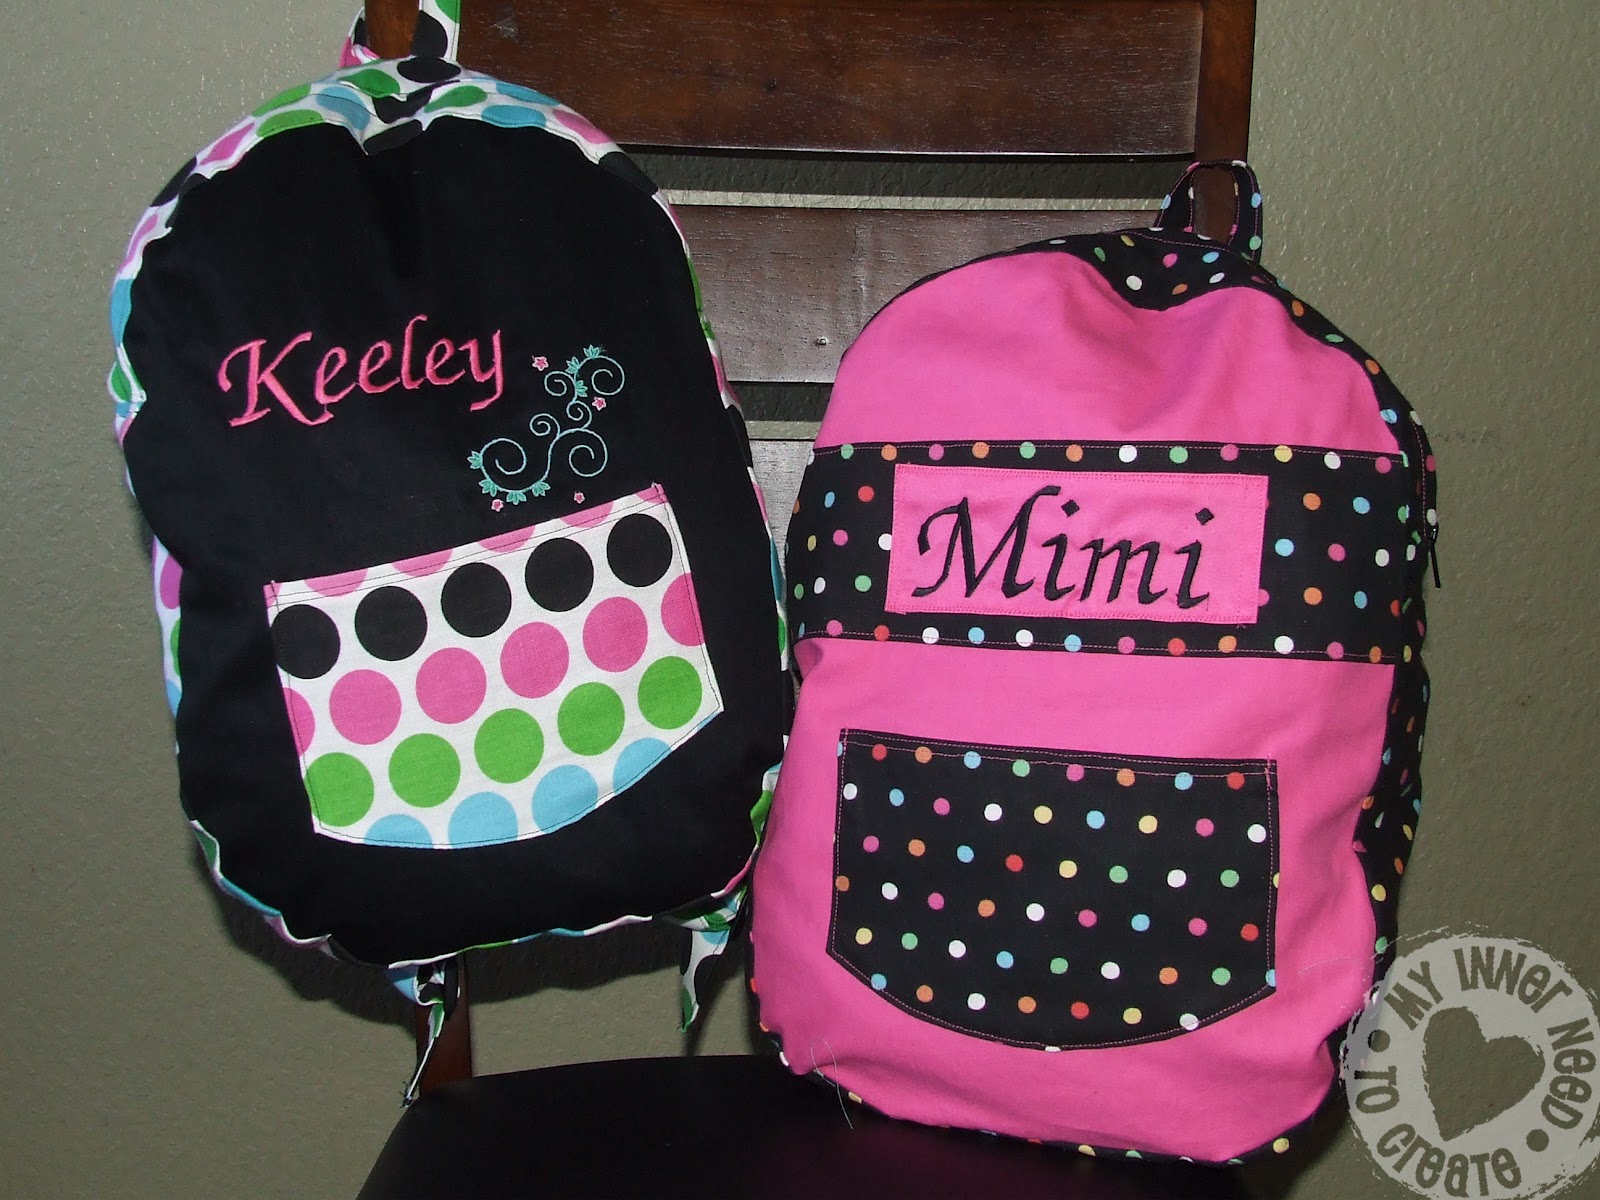
I think that they turned out great! I found this great printed broad cloth at Hobby Lobby and got to use my embroidery function on my machine.
Kids Personalized Backpacks
I made a few changes to the pattern.
First- I was afraid that the pattern was too small and the bag would turn out too small for a regular size folder or papers, so I increased the size of the front and back panels by about an inch all the way around. I also had to increase the width piece so it would be long enough to make it all the way around the bag.
Next- I found after I traced and cut out all the pattern pieces that even though the photo in the book shows the backpack in the plain style (with a single piece flat front) as well as in the penguin embellished style with the split front, that the pattern has the split front panel for both styles. So I used the front panel liner as the pattern piece for the front panel piece as well as for the liner front panel piece.
I did the personalization and the pocket onto the front panel before starting the pattern directions and assembling the bag.

Kids Personalized Backpacks

After I finished the bag (but before inserting the lining) I had my girls try out the bag and found that having the straps sewed into the middle (ish) of the bag made the top of the bag hang over and look weird. This could be because I made the bag bigger, but just warning you, you might want to try it our before inserting the lining. So I moved the straps up and inserted them into the seam at the top of the bag.

Kids Personalized Backpacks

I also couldn't find the 1.5 inch strap adjusters the book calls for. So I just used the 1 inch backpack strap adjusters I found at the store. Just adjust your straps to be 1 inch instead.

Here is the finished bags:

Kids Personalized Backpacks

Kids Personalized Backpacks

I lined the bags with a soft cotton in aqua and it really finished off the bags.

Kids Personalized Backpacks

Kids Personalized Backpacks

Kids Personalized Backpacks

Kids Personalized Backpacks
The bags turned out to be a great size, can fit several coloring books and toys!
Kids Personalized Backpacks

Hope the girls like them! Have a great weekend!
Kids Personalized Backpacks

Kids Personalized Backpacks

Sunday, February 19, 2012

Messenger Bag into a Bike Bag


I am a bike rider, I actually ride my bike more than I drive my car. This is because I take my son to school and pick him up by bike everyday. It is a pretty good ride but we have been doing it, weather permitting, every school day for 3 years now.

On the first day of kindergarten my son rode his little bike and I pulled my 5 month old and 21 month old daughters in my bike trailer. Now as I take my son to 2nd grade, he rides a 2 sizes bigger bike, my 4 year old rides behind him (without training wheels) and my 3 year old rides in the bike trailer. I can't believe how fast they are growing up.
But in this last year I have found that my 3 year old likes to be in the bike seat, up off the ground and looking around, than in the trailer. This would be fine except we like to stay an hour at the park after school so I bring water, crocheting projects, snacks, etc. with me on our afternoon ride. It is easy to carry all this stuff in the big bike trailer but on my bike with the bike seat I couldn't carry a back pack, it hit my daughter right in the face, so I thought I would make myself a bag that could hook to the handle bars of my bike.

I got this Oliver & S Little Things to Sew book for my birthday. I love so many of the patterns in it especially the messenger bag. So I decided to use this pattern for my bike bag.


This bag required bias tape, lots of bias tape, so I thought I would try making some of my own. I used the yellow fabric left over from my daughters Halloween costume. It took allot of time to make and was really annoying, so I am going to use my next 50% off coupon from Jo Ann's to buy a bias making machine. 

After I completed most of the bag but before I attached the back of the bag I sewed on the clips to attach it to my handlebar. This way to can sew it to the outside fabric but not the lining.

I choose these parachute buckles thinking they will be easy to snap on and off.

I folded a piece of gray fabric- 8 inches by 4 inches. Folding the 4 inches, raw edges into the inside, into a 1 inch by 8 each piece.

Insert 2 straps through both sides

Sew the 2 straps together at raw edges.

Measure strap placement by using the bike as your guide. Sew onto the back panel piece (not the lining).

I sewed it a couple times so I can carry heavier items without worry.

Finish the bag according to pattern and you're done!


Hope everyone's winter has been as warm as ours and you all can still get out and ride your bikes!